
侧边栏
古比特佛像网, 编号: 释迦牟尼佛:释迦牟尼佛398
15世纪西藏合金铜释迦牟尼佛(香港邦瀚斯)
尺寸:高28cm
年代:15世纪
质地:合金铜 错银错红铜
风格:西藏
来源:拍卖会
成交:625,000港元(2016.11)
参阅:香港邦瀚斯
鉴赏:
 錯銀錯紅銅佛坐像
西藏,十五世紀
古比特佛像网, 编号: 释迦牟尼佛:释迦牟尼佛398
喜馬拉雅藝術資源網2116號
高 28 釐米 (11 英寸)
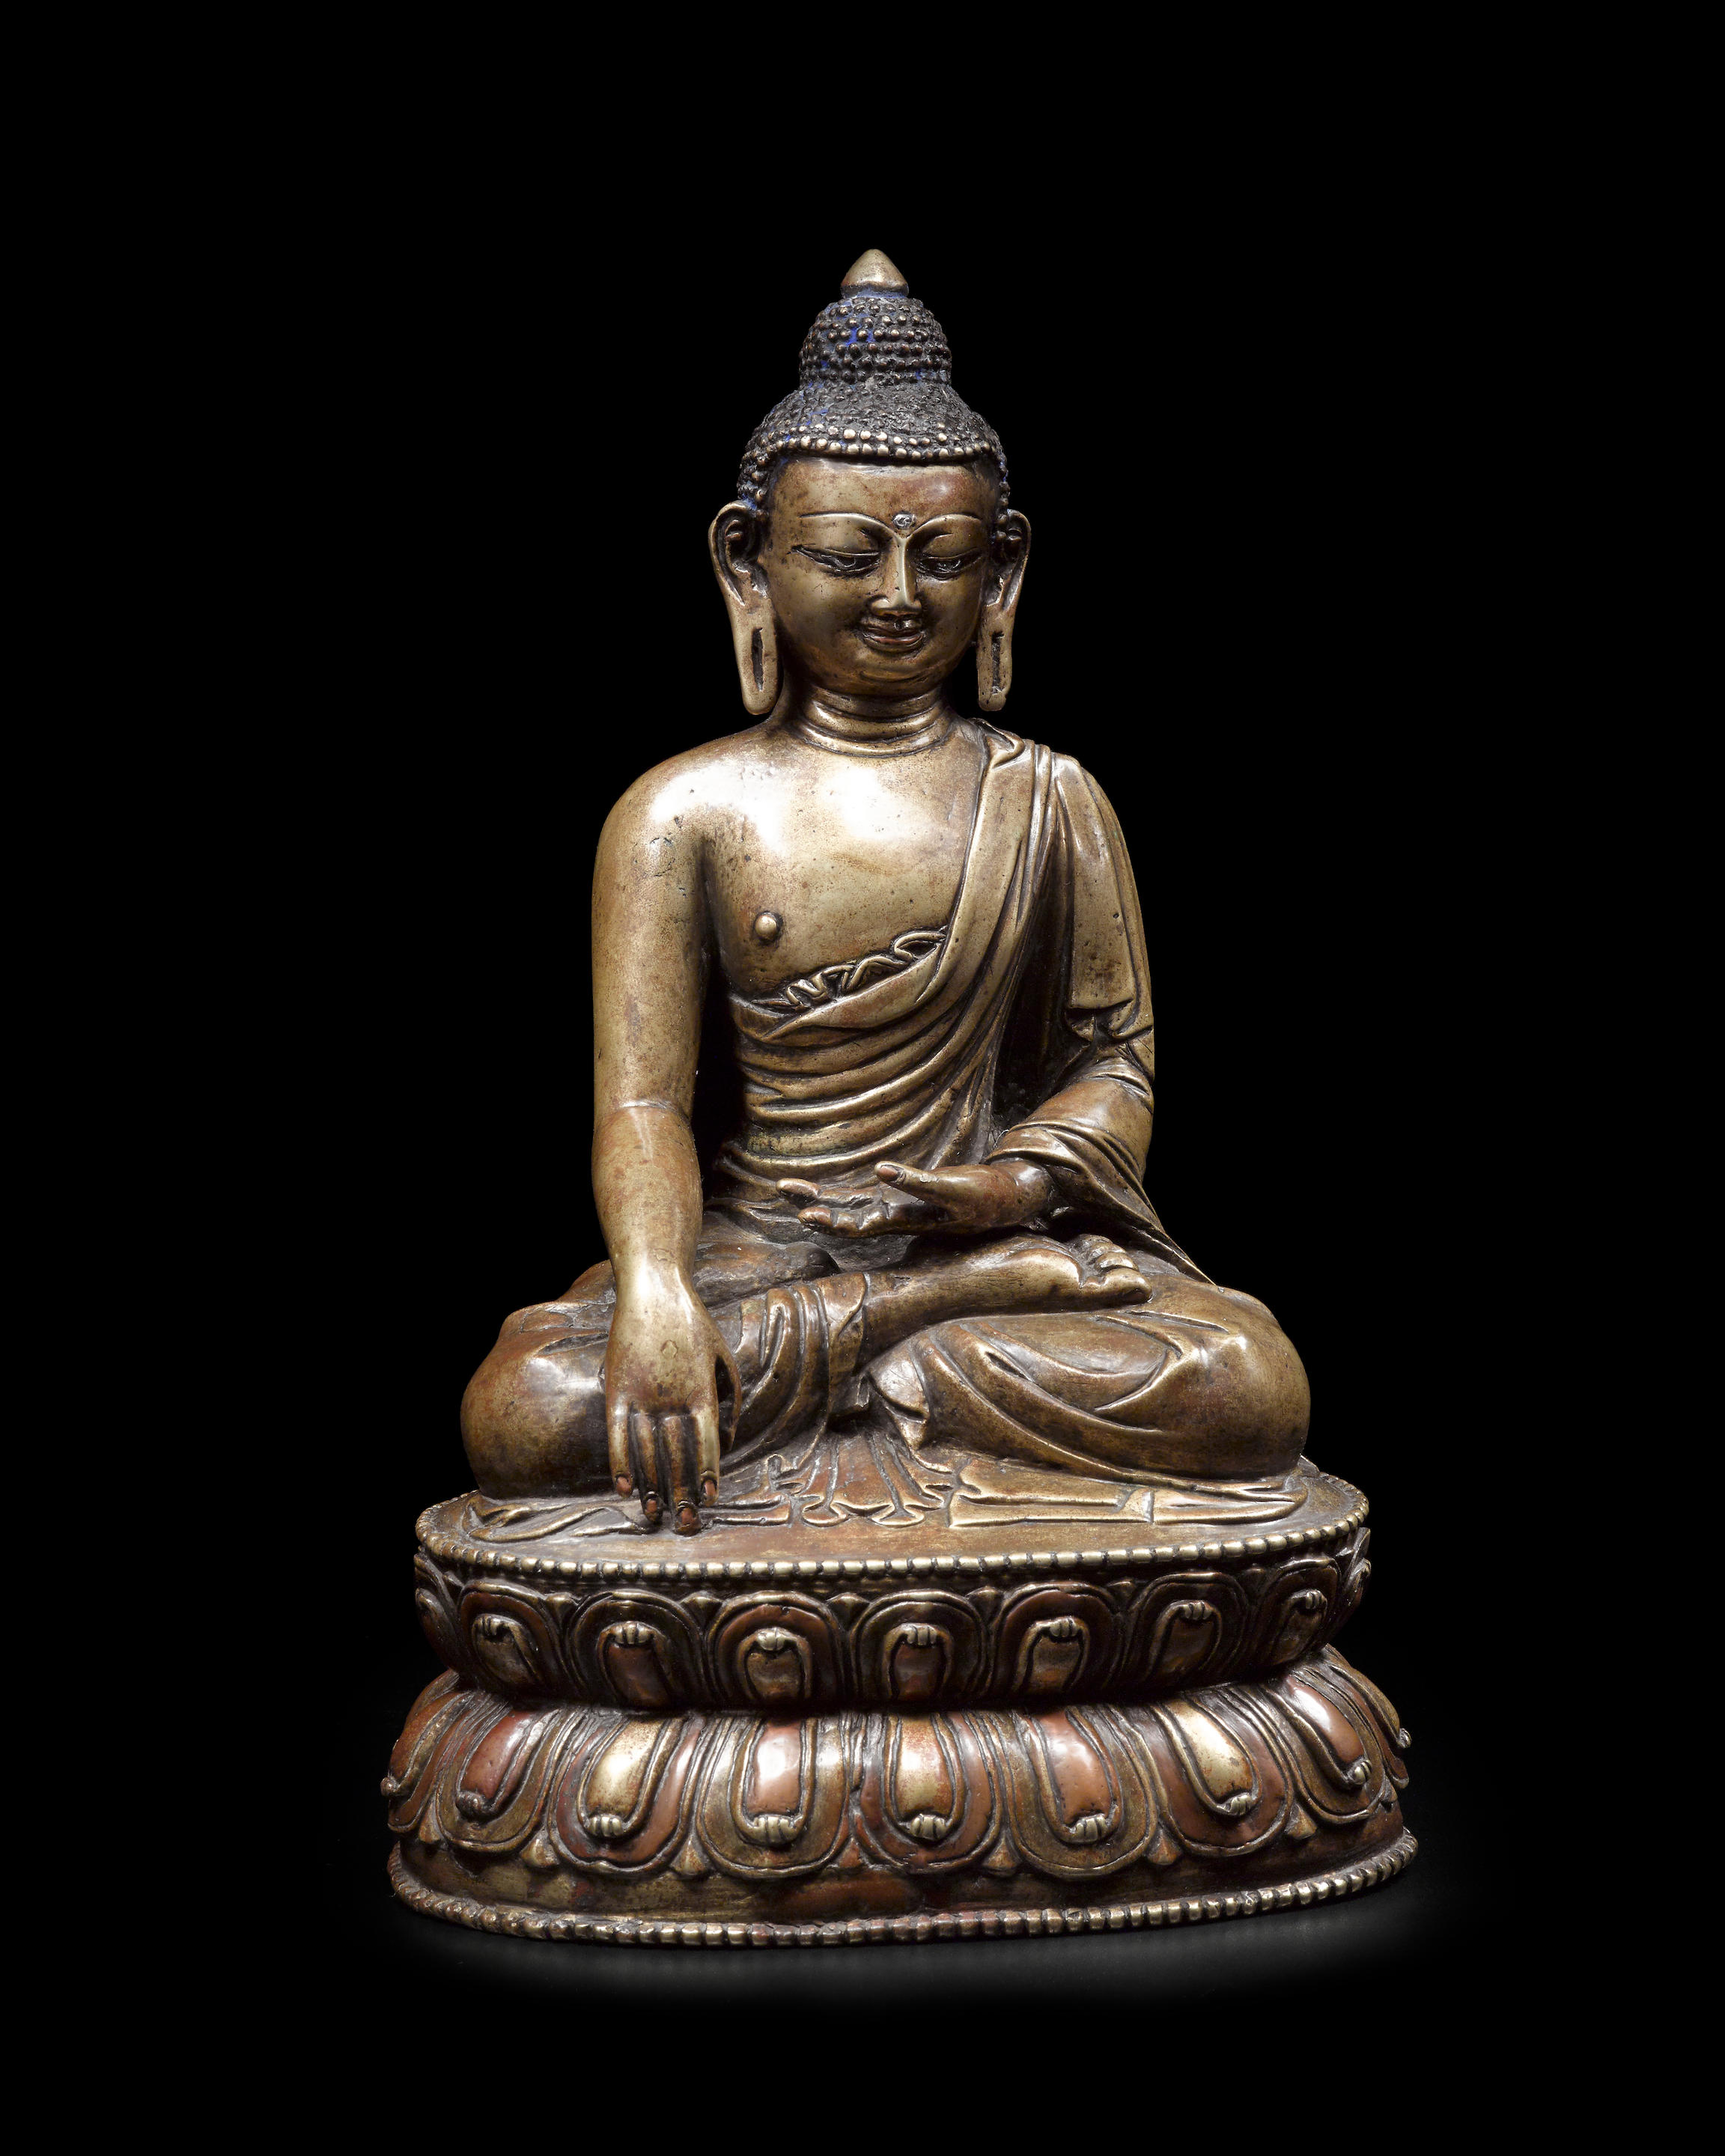
此尊造像形態端莊,以錯紅銅之指尖輕觸底座,用於紀念釋迦牟尼最終戰勝天魔,證道成佛。其身軀魁梧且意氣風發,營造出亙古不變的飽滿之感,眼部以錯銀工藝傳達內在開悟覺識。
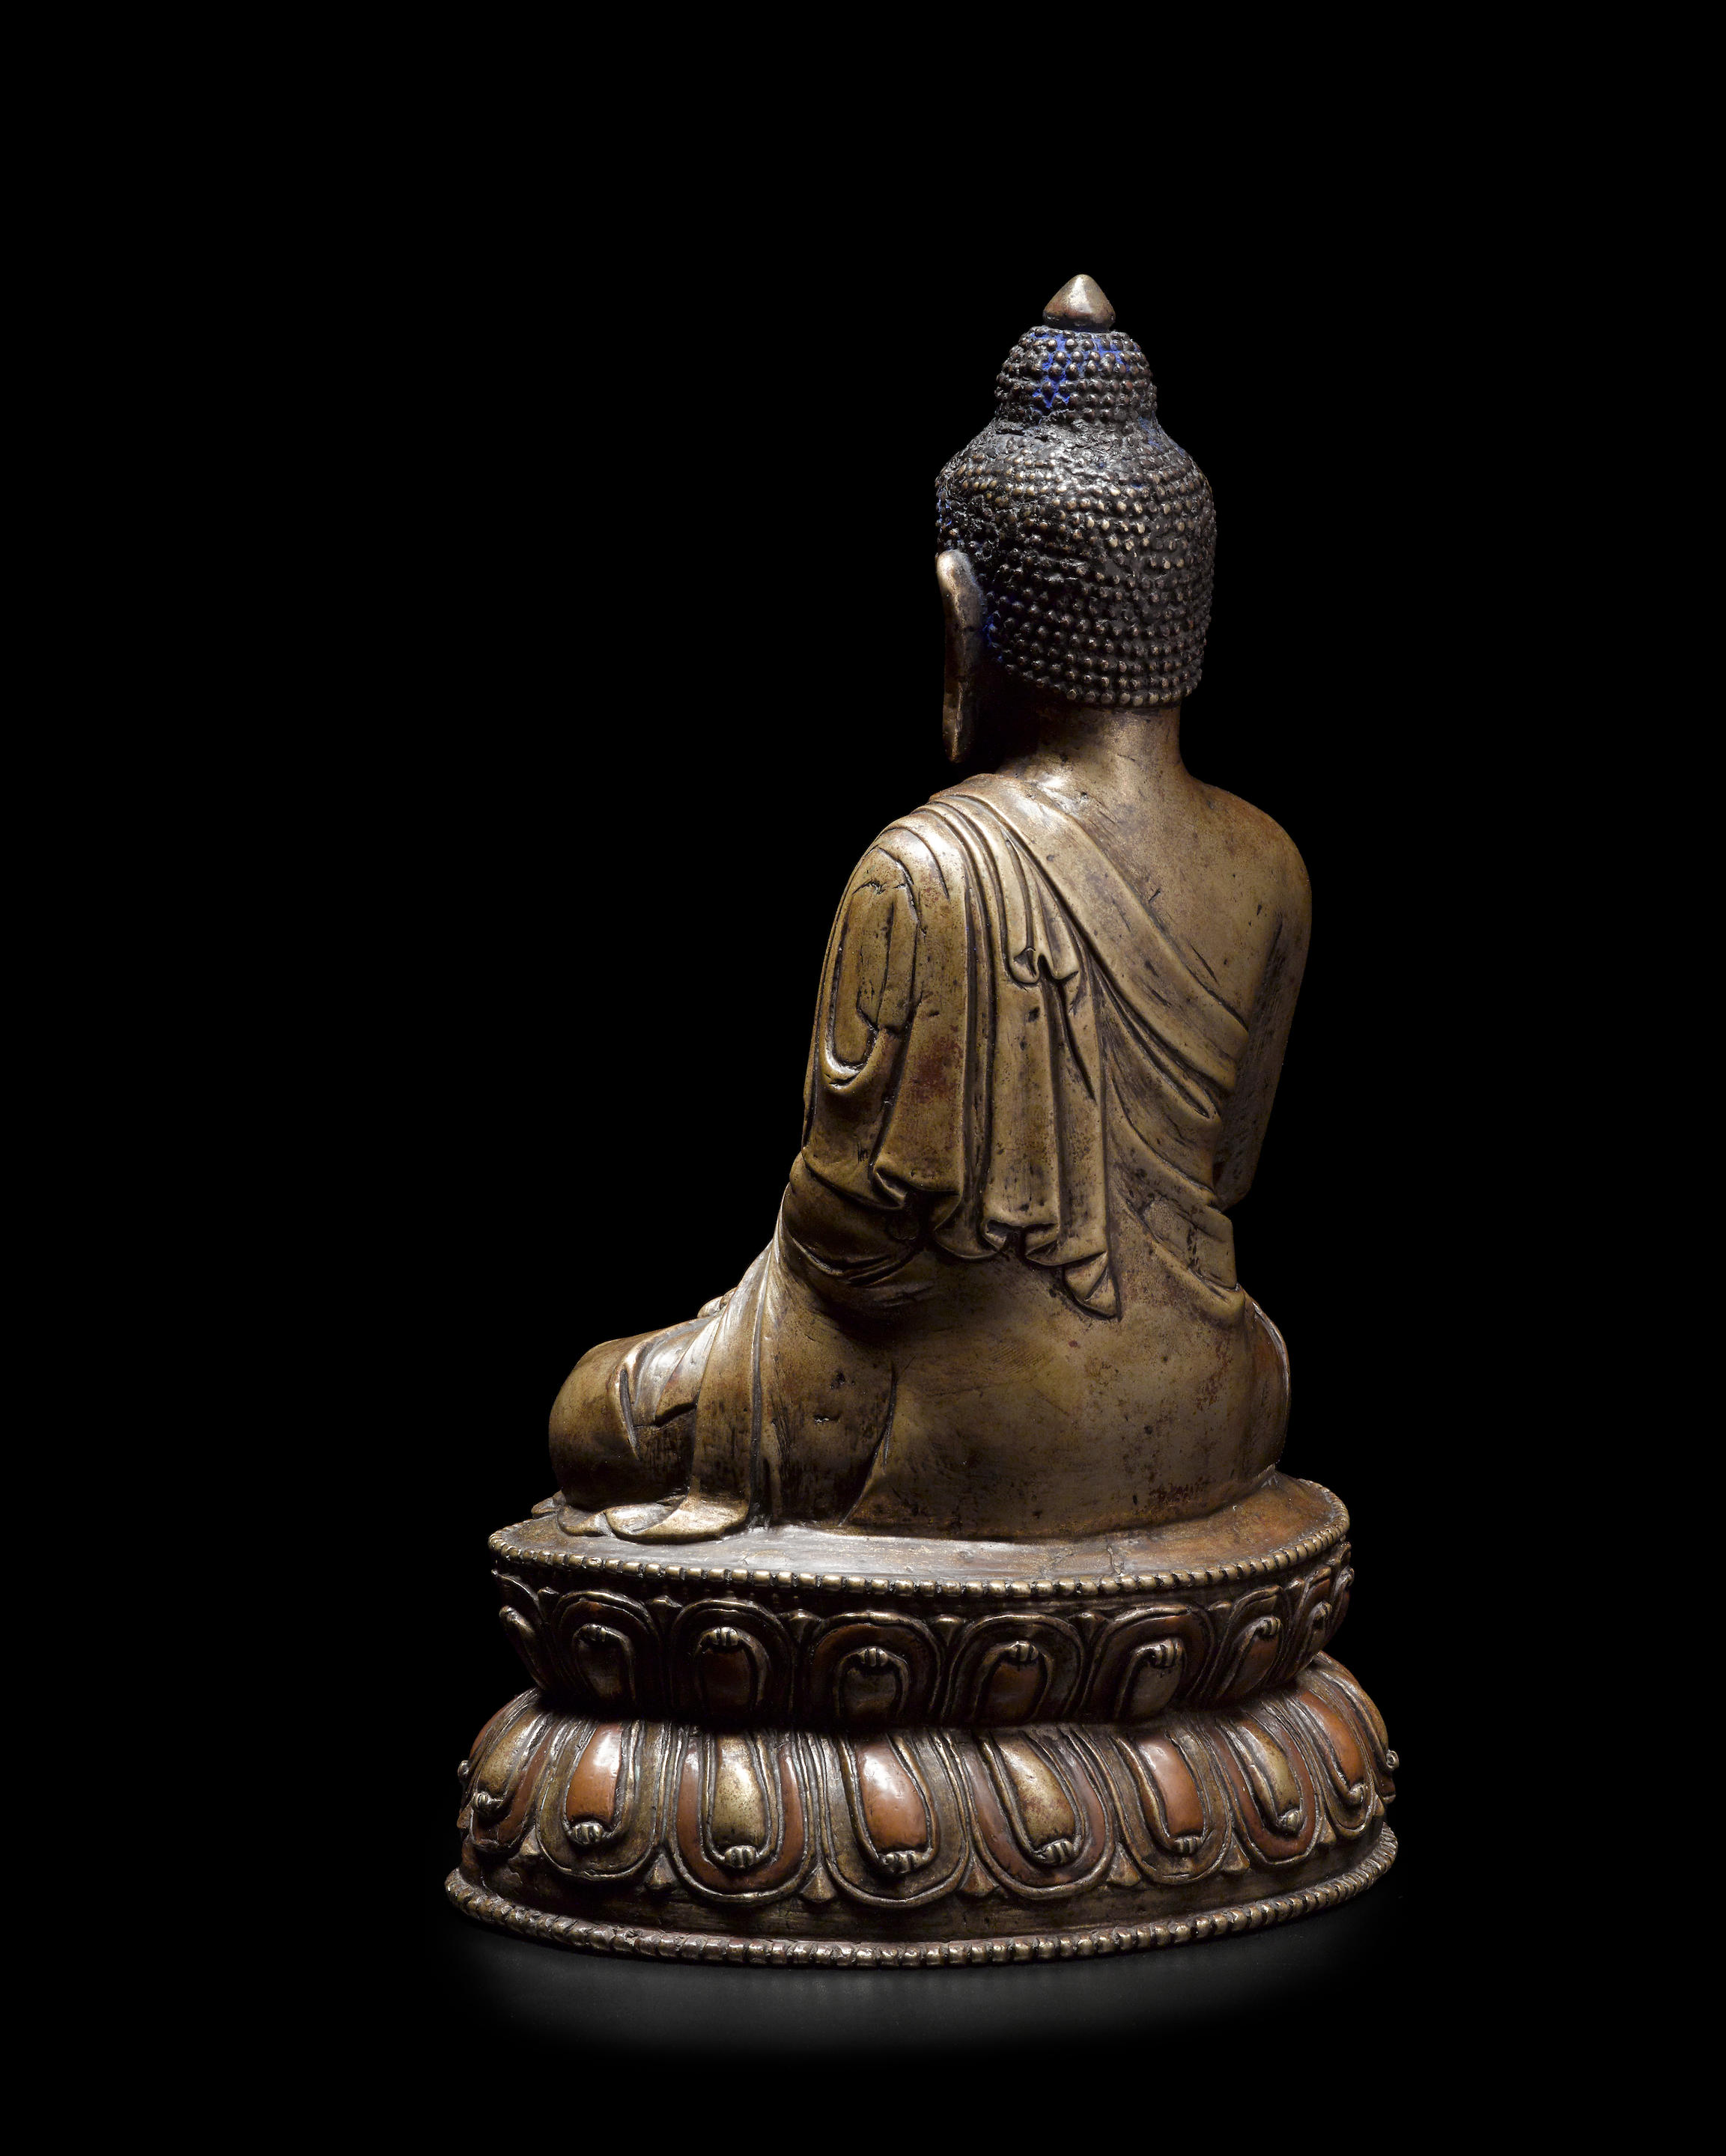
特色鮮明的蓮座飾以交錯的紅銅蓮瓣,與已知的三尊同時期同作坊的薩迦派喇嘛造像一脈相承。第一尊為夏魯派桑傑巴藏像,可見於 Dinwiddie,Portraits of the Masters,倫敦,2003 年,頁 266,74 號。第二尊為迦雅達拿像,於 2015 年 9 月 14 日在紐約邦瀚斯售出,拍品 22 號。第三尊為索南堅贊像,可追溯至其共同創作地,即江孜鎮白居寺(參閱 Rhie 與 Thurman,A Shrine for Tibet,紐約,2009 年,頁 20,圖 5)。Rhie 在其著作中更提及了大量風格相同的薩迦派上師像。
薩迦派於十四到十六世紀期間蓬勃發展,而作為該派之重要聖地,白居寺收到明初(十五世紀左右)皇帝的眾多外交贈禮,包括佛教造像、繪畫與織物。此些贈禮出自宮廷造辦處,工藝水平高超,盡顯宮廷風格,用於取悅打動收禮之人,亦傳達對佛法之共同崇信。
這也解釋了本拍品雖出自藏中,卻帶有十五世紀明初宮廷風格之原因。除蓮瓣之外,其帶有蓮花芽尖的圓錐形頂髻、寬闊的臉龐、及袈裟的刻畫——左肘之上衣褶誇張明顯、腰間褶邊緊密、腿部圓形褶皺勾勒出膝蓋形狀,皆與明朝初期類似主題的宮廷造像與織物相同。比如一尊藏於故宮博物院的銅鎏金佛像與之風格相似(參見藏傳佛教造像,香港,1992 年,頁 223,212 號),亦可比照本次拍賣中的一件刺繡作品(拍品 123 號)。同時,參見出自江孜附近地區的一部帶永樂款的同時期佛教畫卷(Thomas Laird,Murals of Tibet,Taschen 出版社,即將於 2017 年出版)。
佛教藝術宮廷贈禮於十六世紀開始減少,而本拍品則是十五世紀文化交流興盛時期之歷史明證,令人遙想明朝初期與西藏薩迦之風采。
來源
美國私人收藏
購於東寶齋,香港,二十世紀九十年代
A SILVER AND COPPER INLAID COPPER ALLOY FIGURE OF BUDDHA
TIBET, 15TH CENTURY
Himalayan Art Resources item no.2116
With a copper-inlaid fingertip pressed to the base, this bronze commemorates Shakyamuni's final victory over Mara and his attainment of Buddhahood. Full-bodied and uplifting, the caster harnesses the alloy to impress a sense of volume at every instance, and embellishes the eyes with silver to convey the enlightened consciousness within.
The distinctive lotus base, with alternating copper-inlaid lotus petals, is shared by three known examples from the same period and atelier, all of them Sakya lamas. One, of Shalupa Sangye Pelzang, is published in Dinwiddie (ed.) Portraits of the Masters, London, 2003, p.266, no.74. The second, of Gayadhara, was recently sold at Bonhams, New York, 14 September 2015, lot 22. The third, of Sonam Gyaltsen, was traced back to their common place of production at Pelchor Chode in Gyantse (cf. Rhie & Thurman, A Shrine for Tibet, New York, 2009, p. 20, fig. 5). Rhie references a large number of further Sakya lamas in the same style within repositories there.
An important enclave for the Sakya, who flourished between the 14th and 16th centuries, Pelchor Chode received many diplomatic gifts from the emperors of the early Ming (c.15th century), in the form of Buddhist bronzes, paintings, and textiles. Produced at the imperial workshops, these were of the highest quality rendered within the court style, meant to please and impress the recipients, and convey a common reverence for Buddhist teachings.
This explains why the present lot, although of Central Tibetan origin, adopts an early 15th-century Ming imperial style. Its lotus petals aside, the rounded conical ushnisha with a lotus bud finial, the broad face, and the treatment of the robe – with dramatic pleats above the left elbow, tight ruffles around the waist, and rounded folds across the legs echoing the shape of the knees – are all shared by imperial bronzes and textiles of similar subjects produced for the Early Ming court. For example, compare with a gilt bronze Buddha held in the Qing Palace Collection (Zangchuan Fojiao Zaoxiang, Hong Kong, 1992, p.223, no.212), and a textile included within this sale (lot 123). Meanwhile, Yongle-mark and period illustrated Buddhist scrolls survive in nearby Gyantse repositories (see Thomas Laird, Murals of Tibet, Taschen, forthcoming 2017).
Imperial gifts of Buddhist art began to wane by the turn of the 16th century, but the present lot is a resounding testament to the fertile period of culture exchange within the 15th century, and the impressive reach of the Early Ming empire and the Tibetan Sakya order.
Provenance
Private US Collection
Acquired from Hollywood Galleries, Hong Kong, 1990s
本页地址: https://fo.gubit.cn/释迦牟尼佛/释迦牟尼佛398 · 最后更新: 2022/02/27 10:58 (外部编辑)
Copyright 2019-2100 https://fo.gubit.cn
